Managing Mods, Resource Packs, Shaders And More
This page will help you manage mods, resource packs, shaders and more for your instances.
First you’re going to need to create an instance with a modloader installed.
In order to manage the content in your instance, you can use the “Edit Mods” button on the instance:
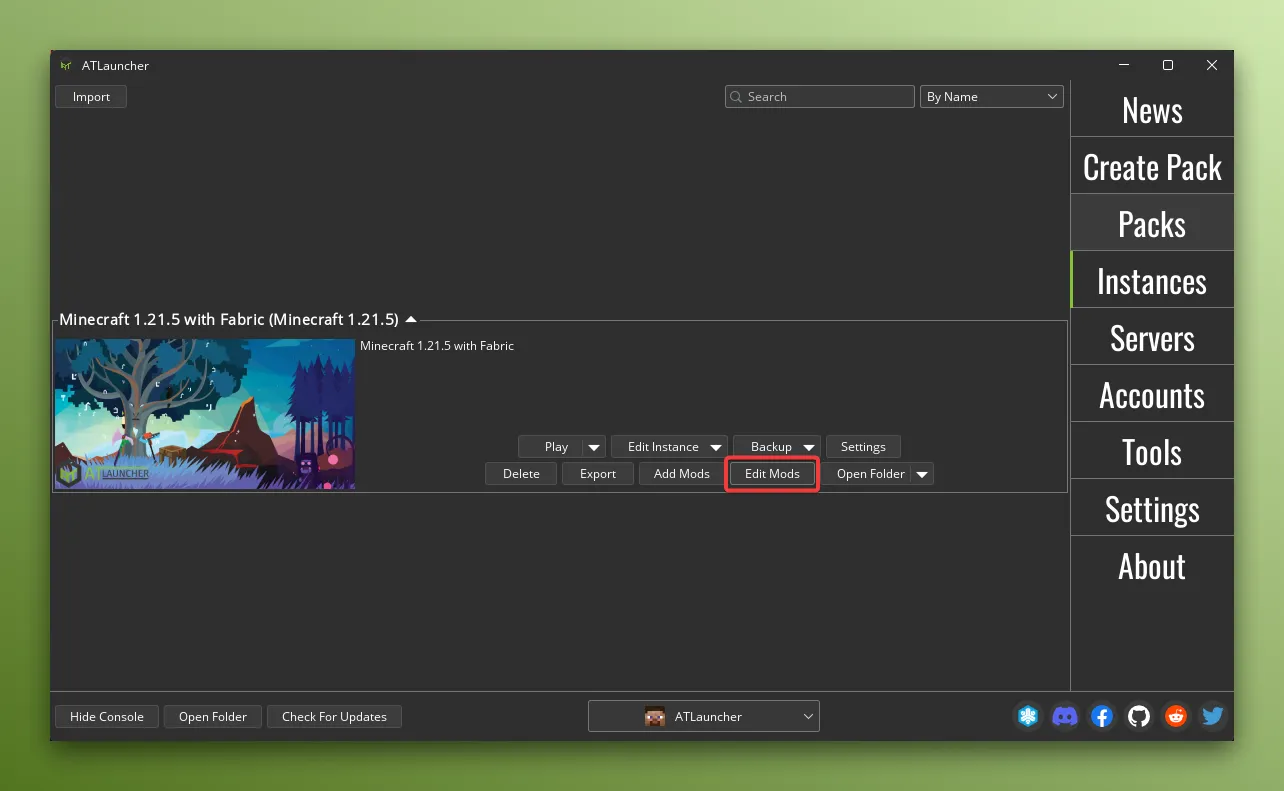
This will bring up a screen where you can see all the mods, resource packs, shaders and more that are installed in your instance.
View Mod Details
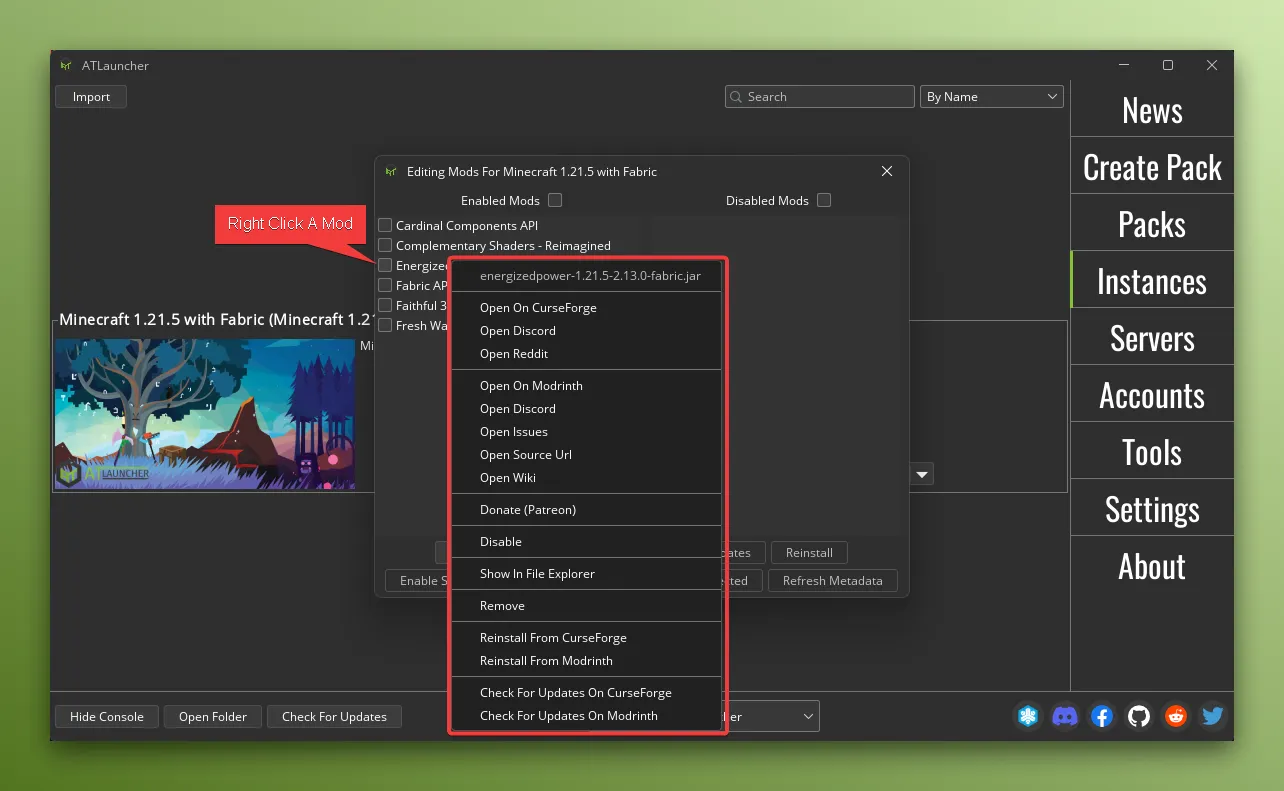
Section titled “View Mod Details”You can view the details of a mod by right clicking an item to bring up the details of the mod, links to the mod on CurseForge/Modrinth as well as the links provided by the mod author (such as to YouTube, X, GitHub, Discord, etc):
Enable and Disable Mods
Section titled “Enable and Disable Mods”You can enable and disable mods by either right clicking a single mod and then choosing to enable or disable it, or by checking or unchecking the box next to the mod and then using the Enable/Disable Selected buttons at the bottom:
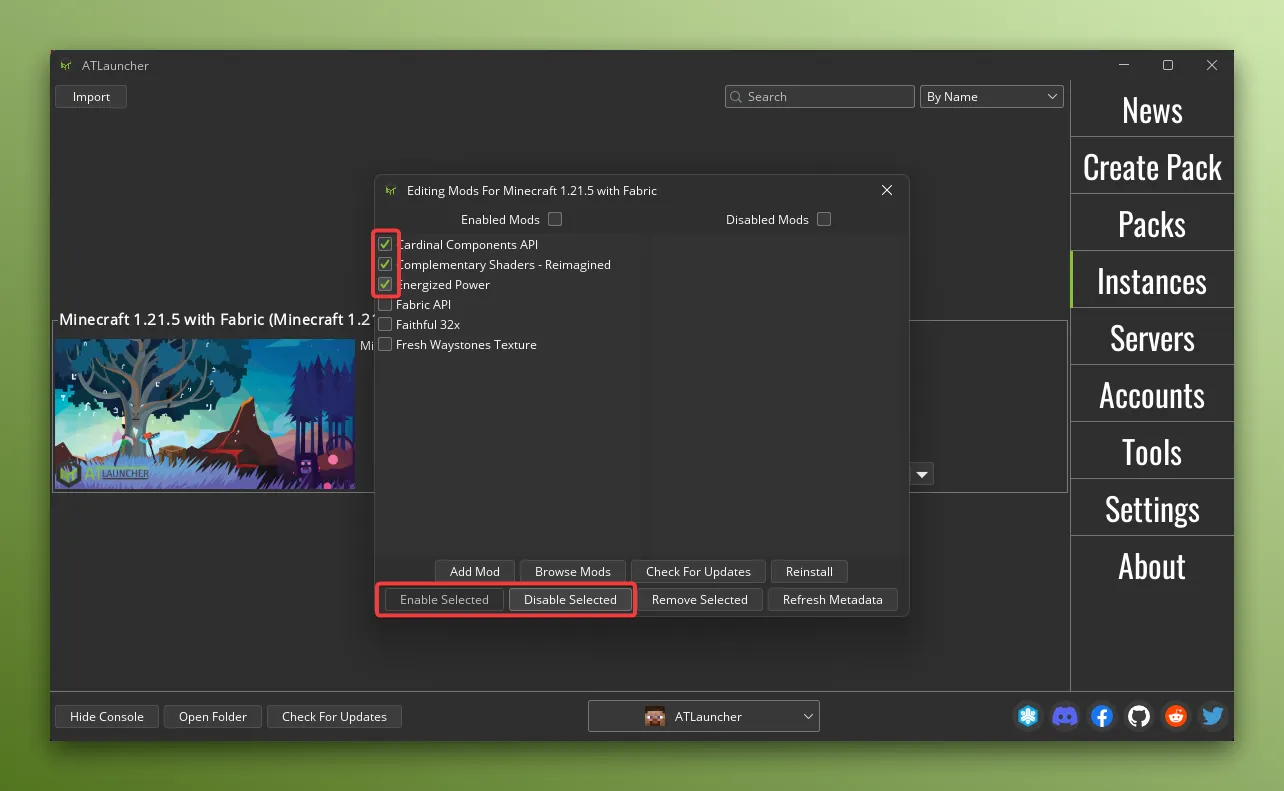
Disabling a mod will not remove it from the disk, but will make it not load when launching your instance.
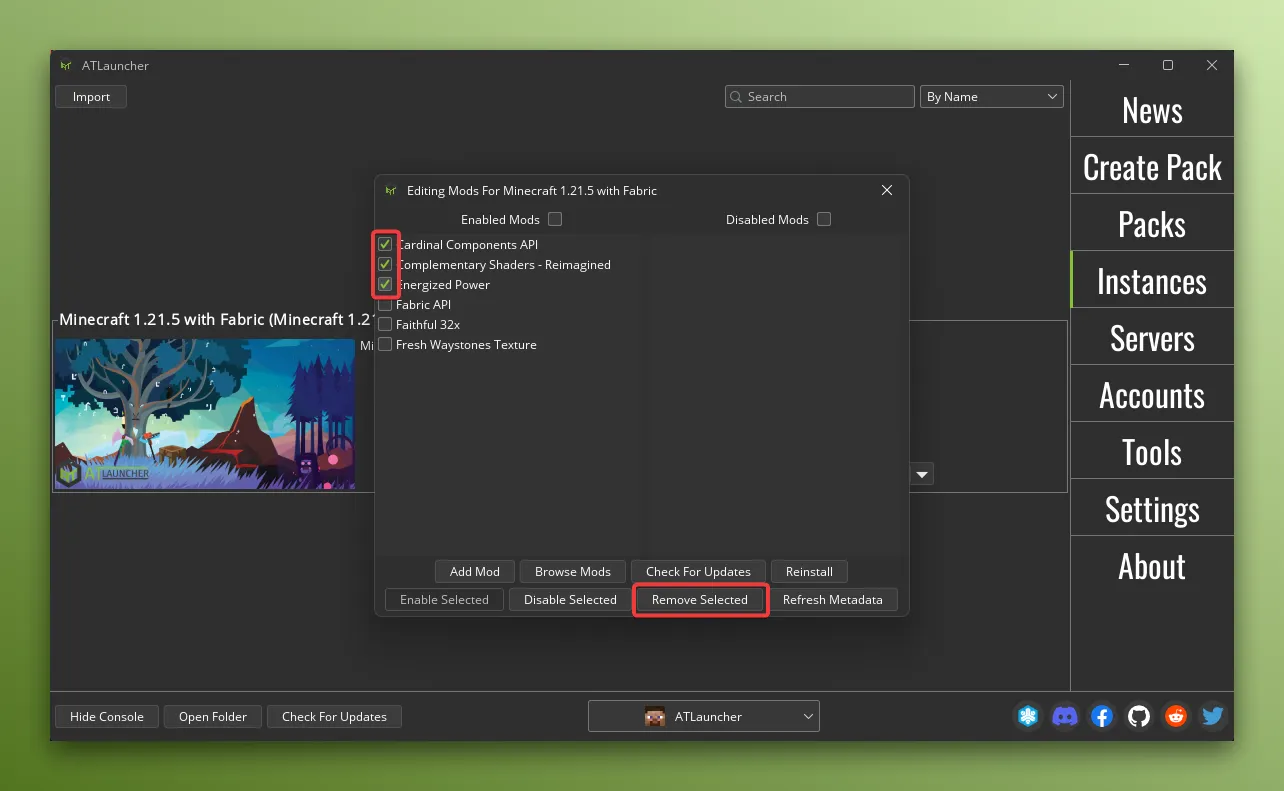
Deleting Mods
Section titled “Deleting Mods”You can delete mods by either right clicking a single mod and then choosing to delete it, or by checking or unchecking the box next to the mod and then using the Delete Selected buttons at the bottom:
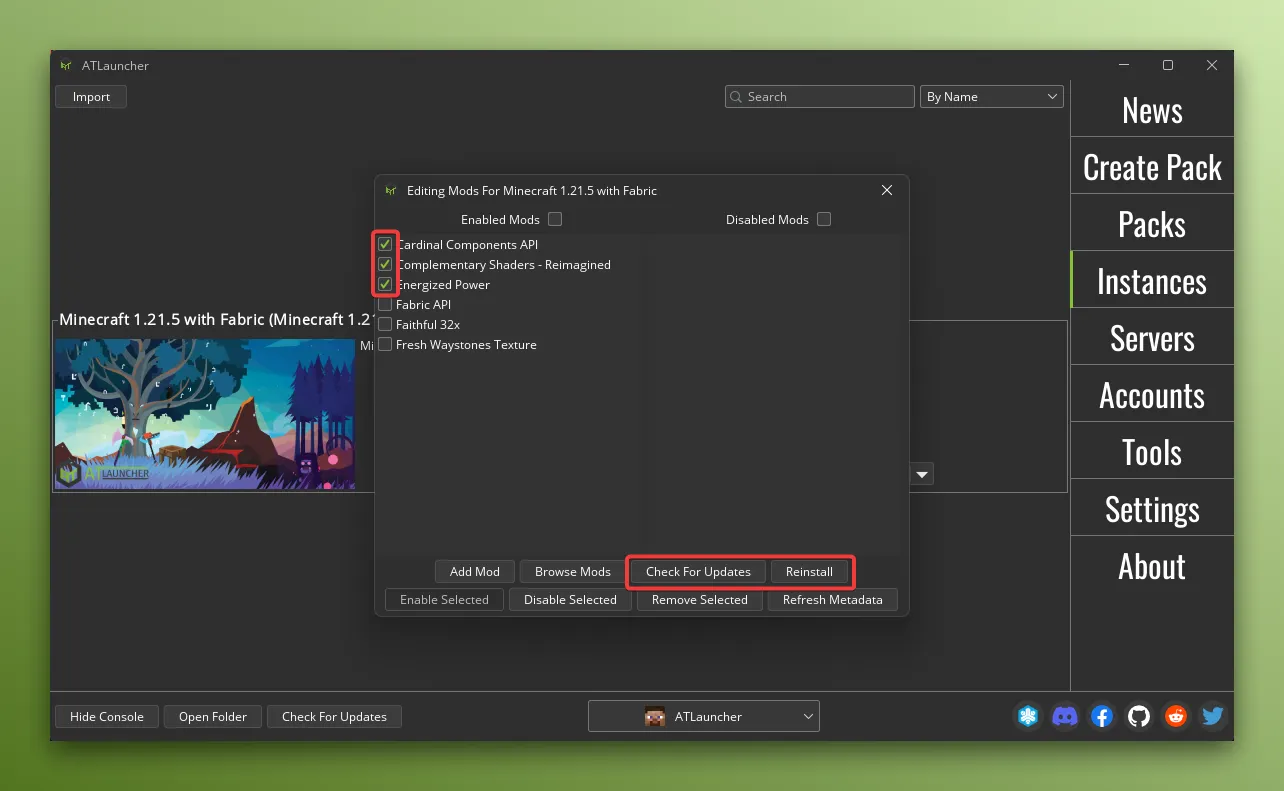
Checking For Updates/Reinstalling Mods
Section titled “Checking For Updates/Reinstalling Mods”You can check for updates to the mods in your instance by right clicking an item and then choosing to check for updates or reinstall, or by checking or unchecking the box next to the mod and then using the Check For Updates or Reinstall button at the bottom: