Creating an Instance
Instances are the way to play Minecraft. You can create as many instances as you want, and each instance is completely separate from the others. This allows you to play different modpacks and different versions of Minecraft without having to worry about them interfering with each other.
Depending on what you want to play, there are different ways to create an instance.
Create A Vanilla Instance
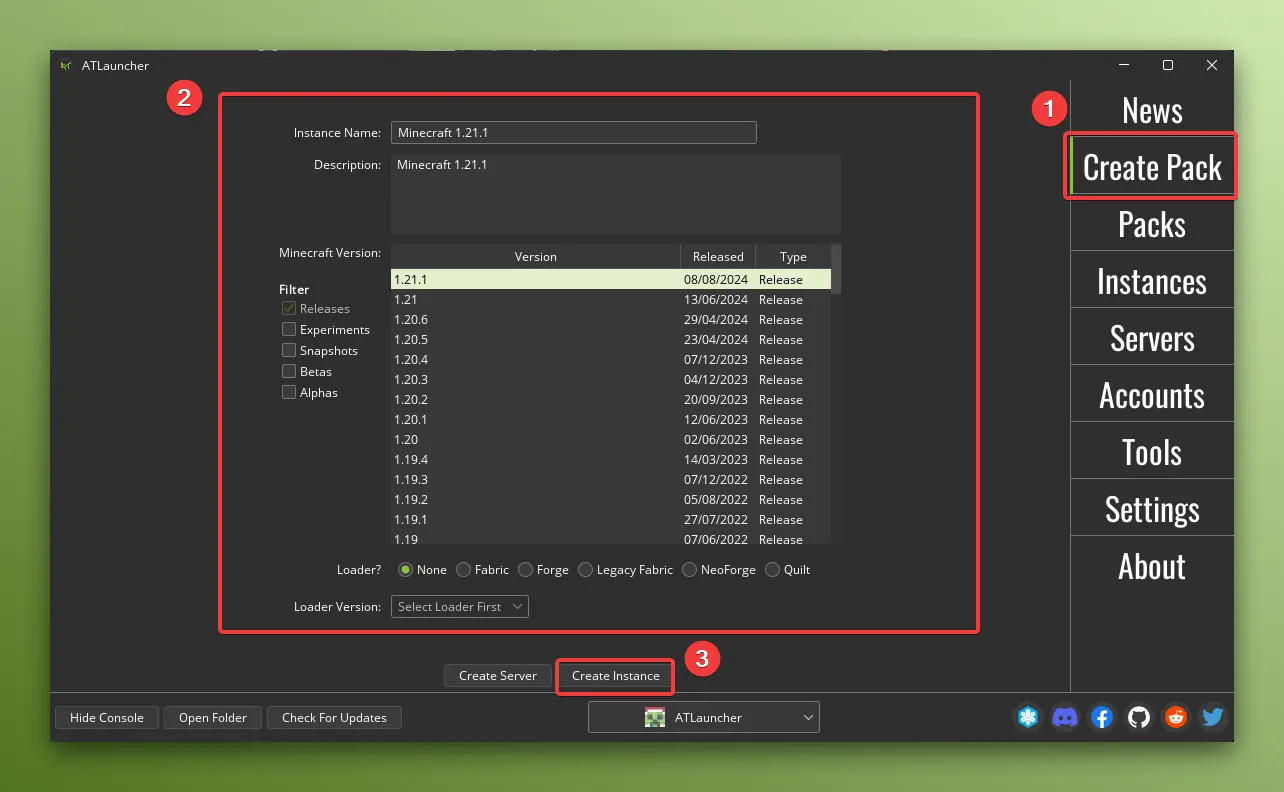
Section titled “Create A Vanilla Instance”You can create a vanilla instance by going to the Create Pack tab and selecting the version of Minecraft you want to play, as well as giving it a name and description:

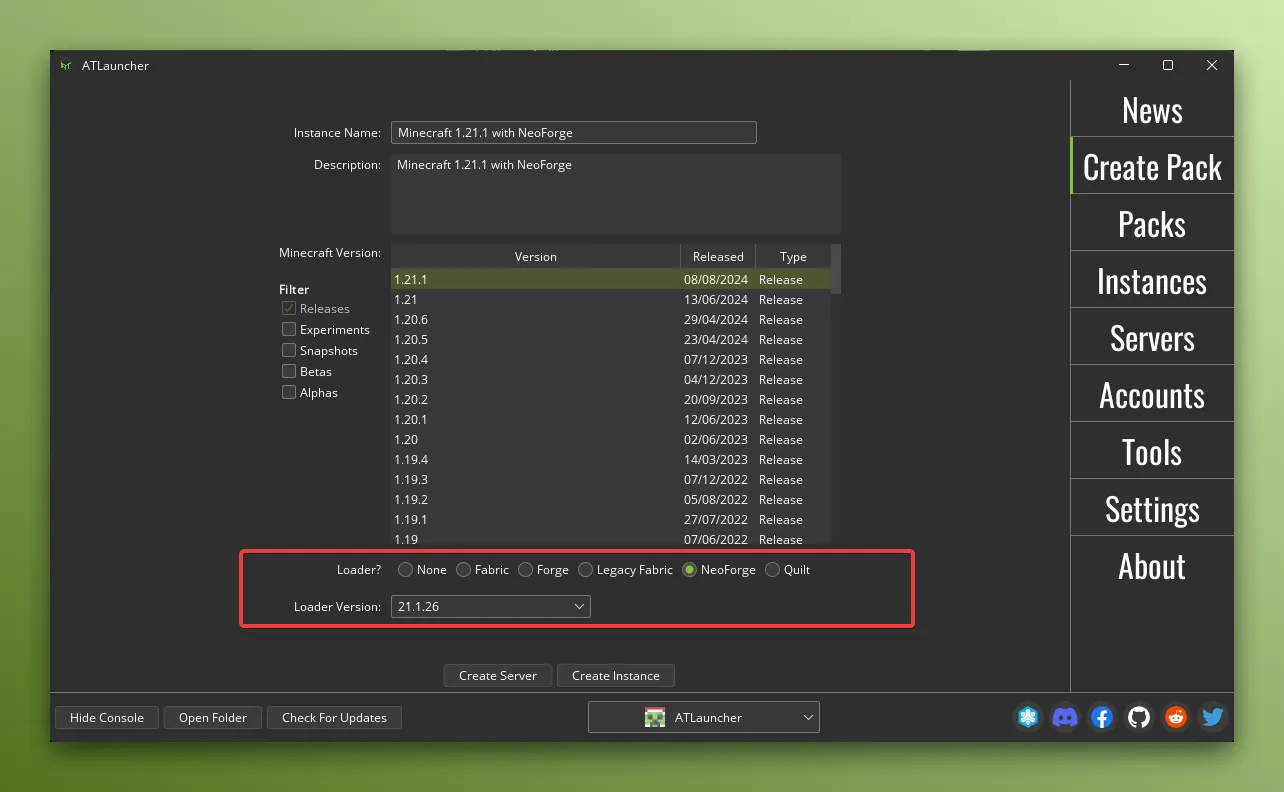
You can optionally choose a modloader to use if you plan to install mods to the instance. Once you select the modloader, you can then select the version of the modloader you want to use:

Then you can click the “Install” button to start the install process and create the instance.
Once created it will be listed in the Instances tab.
Downloading A Premade Modpack
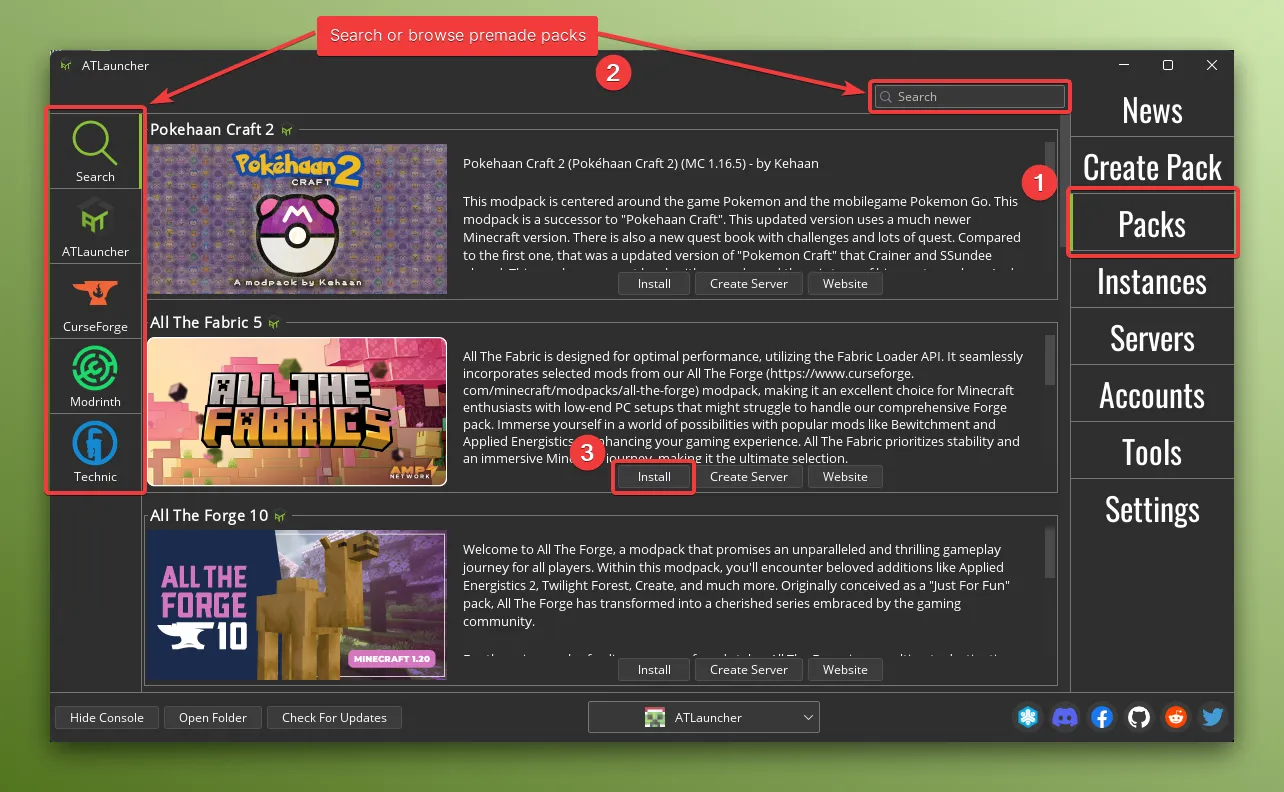
Section titled “Downloading A Premade Modpack”If you want to download a premade modpack, such as one from ATLauncher, CurseForge or Modrinth, you can do so by going to the Packs tab. You can search for a specific pack if you know the name, else you can browse the different platforms by using the tabs on the left side of the screen.
Alternatively if you don’t know what you want to play, a list of all the popular packs will be shown by default when you visit the Packs tab.
Once you’ve found the pack you want to download, you can click the “New Instance” button to download the pack:

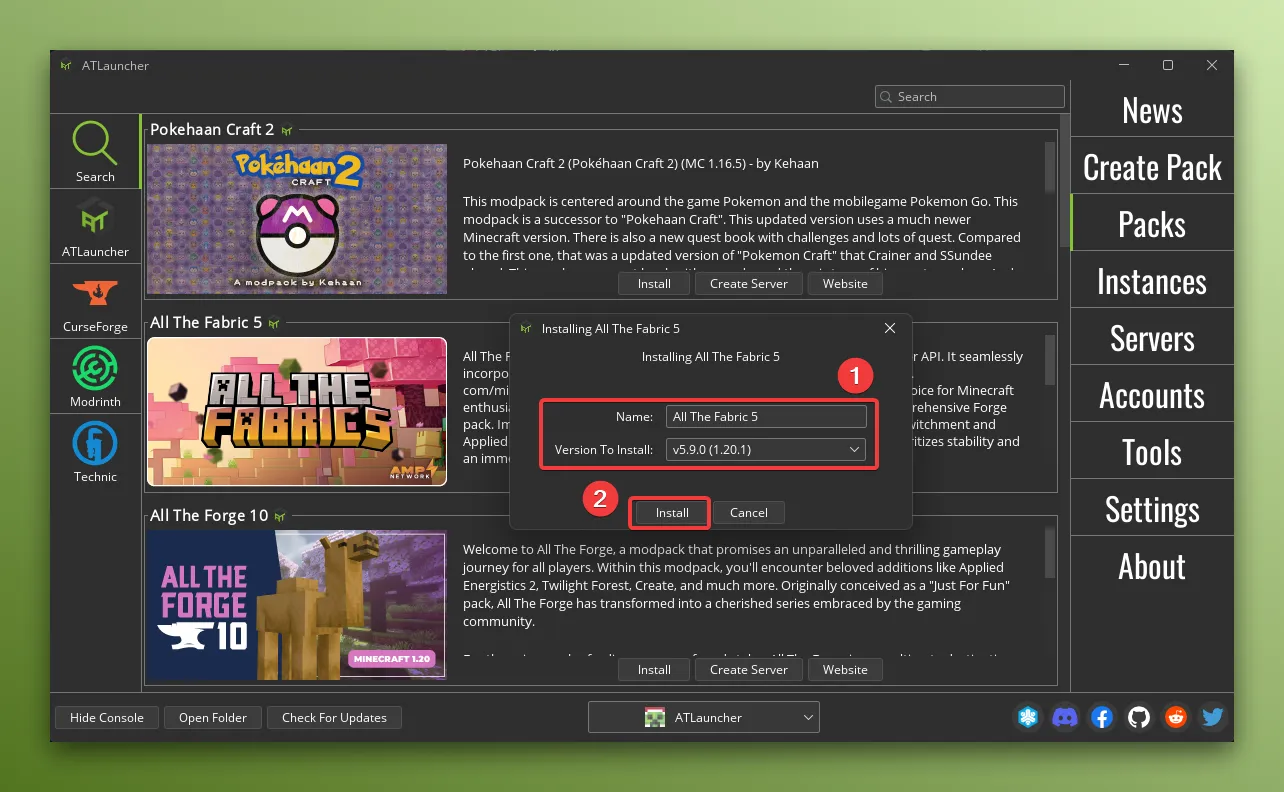
Then you can select a name for your instance as well as picking a specific version of the Modpack to play:

You can then click the “Install” button to start the install process and create the instance.
Once created it will be listed in the Instances tab.