Choosing Which GPU For Minecraft To Use
If you have multiple GPUs in your system (which is common for gaming laptops), you may want to choose which GPU to use for Minecraft.
A lot of time, the default will be to use the less powerful GPU that’s built into your CPU for power saving reasons.
You likely will want to change that so that it uses your dedicated GPU for more performance.
Changing For Windows 10/11
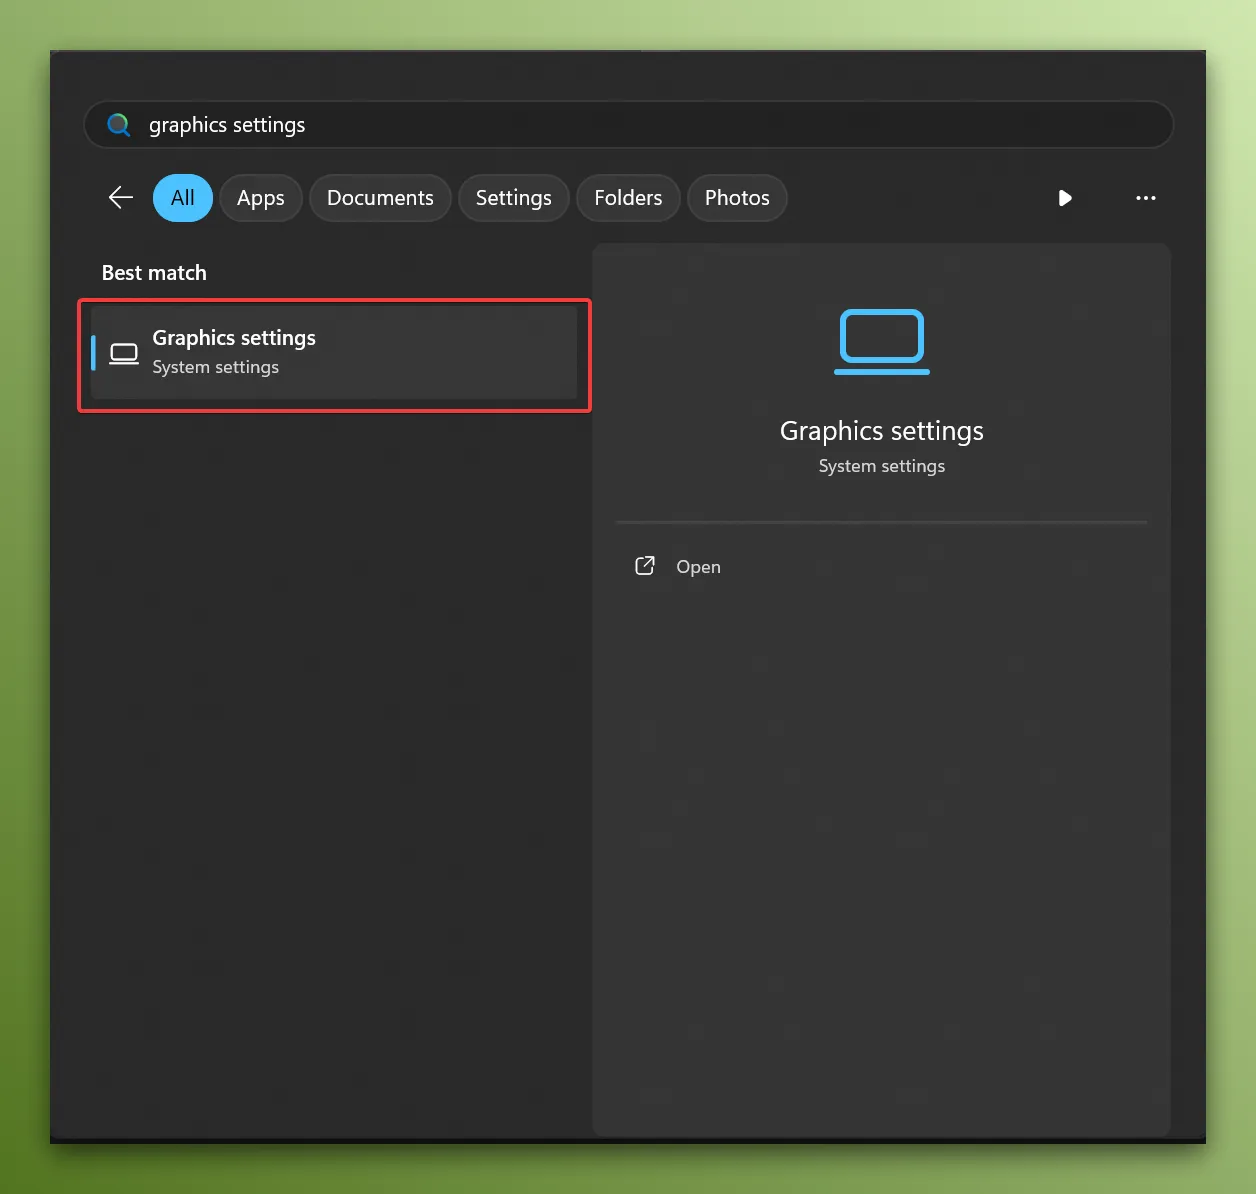
Section titled “Changing For Windows 10/11”To set the GPU that’s used for Windows 10/11, you can use the Graphics settings application which you can find in the start menu:
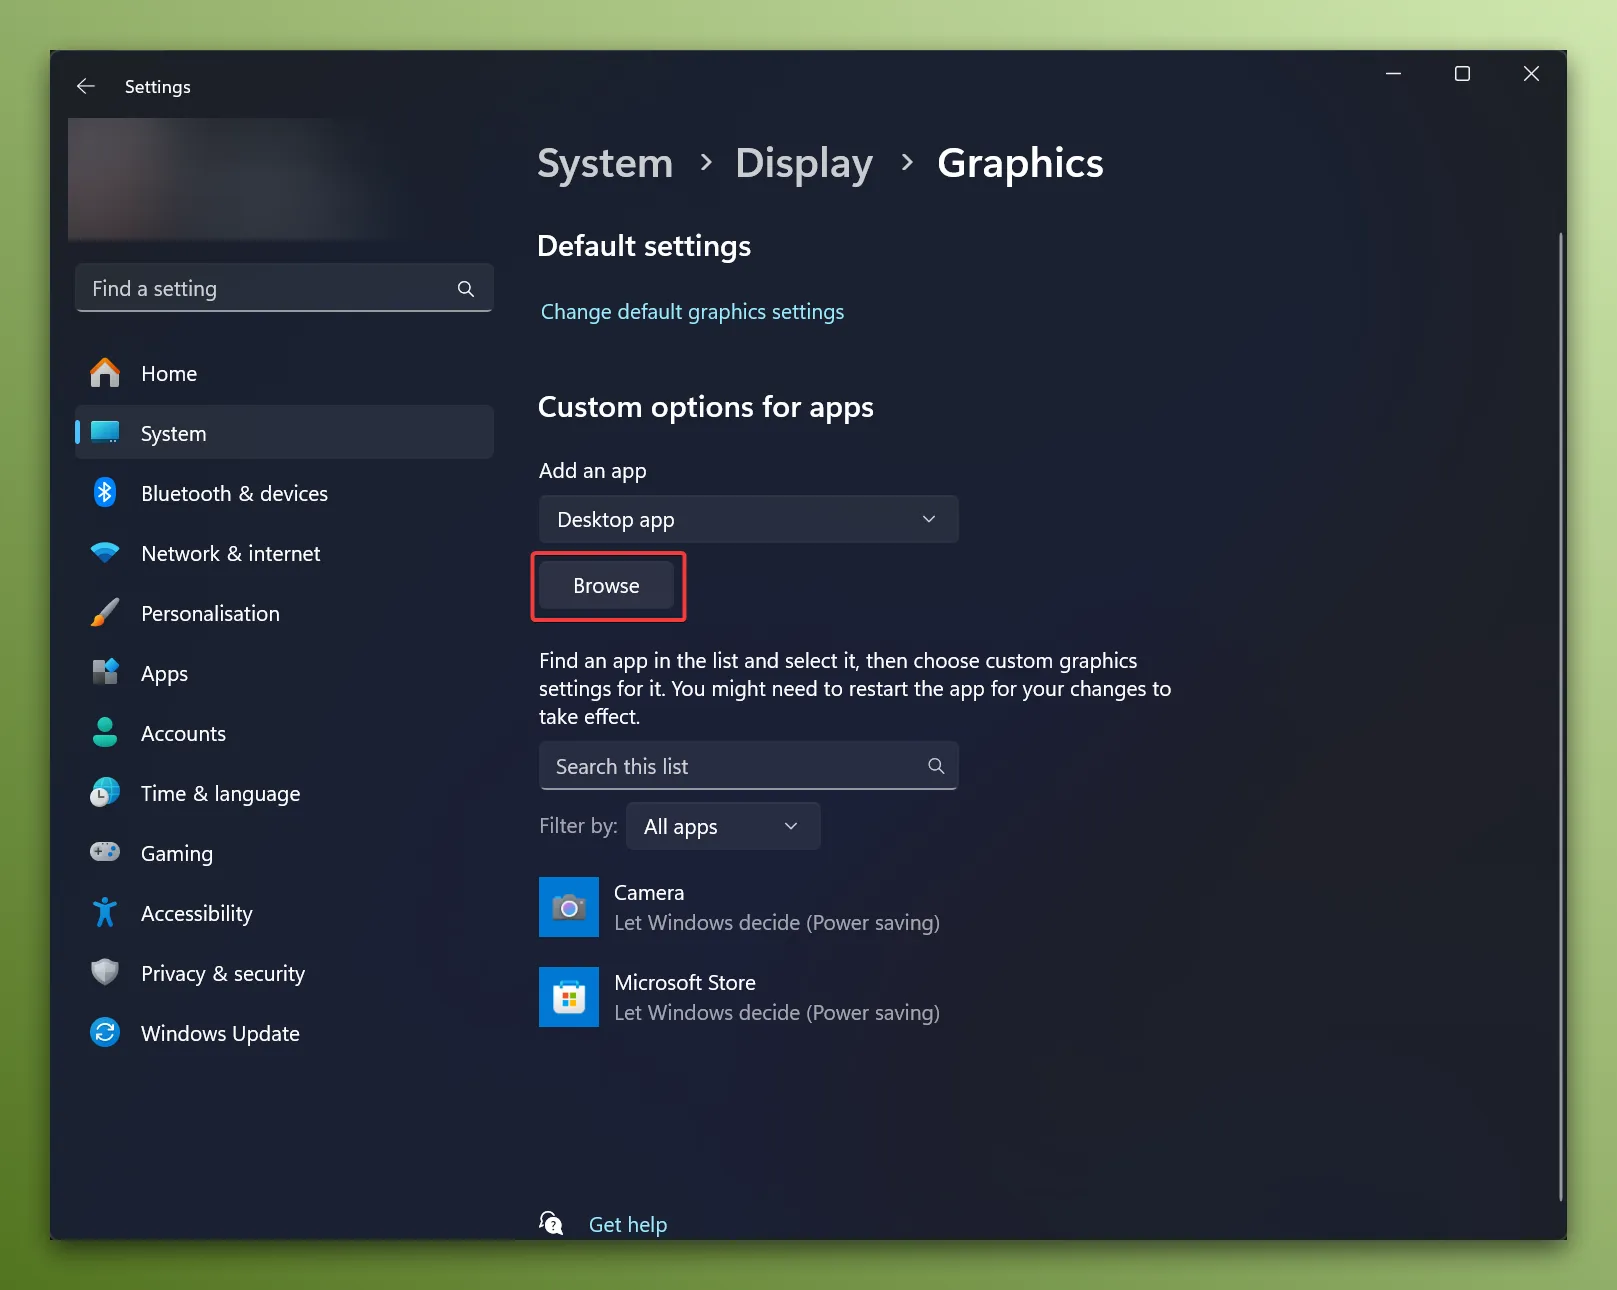
Then you can click the “Browse” button:
You then need to browse to the folder that you installed ATLauncher.
Click here if you don’t know where ATLauncher is installed.
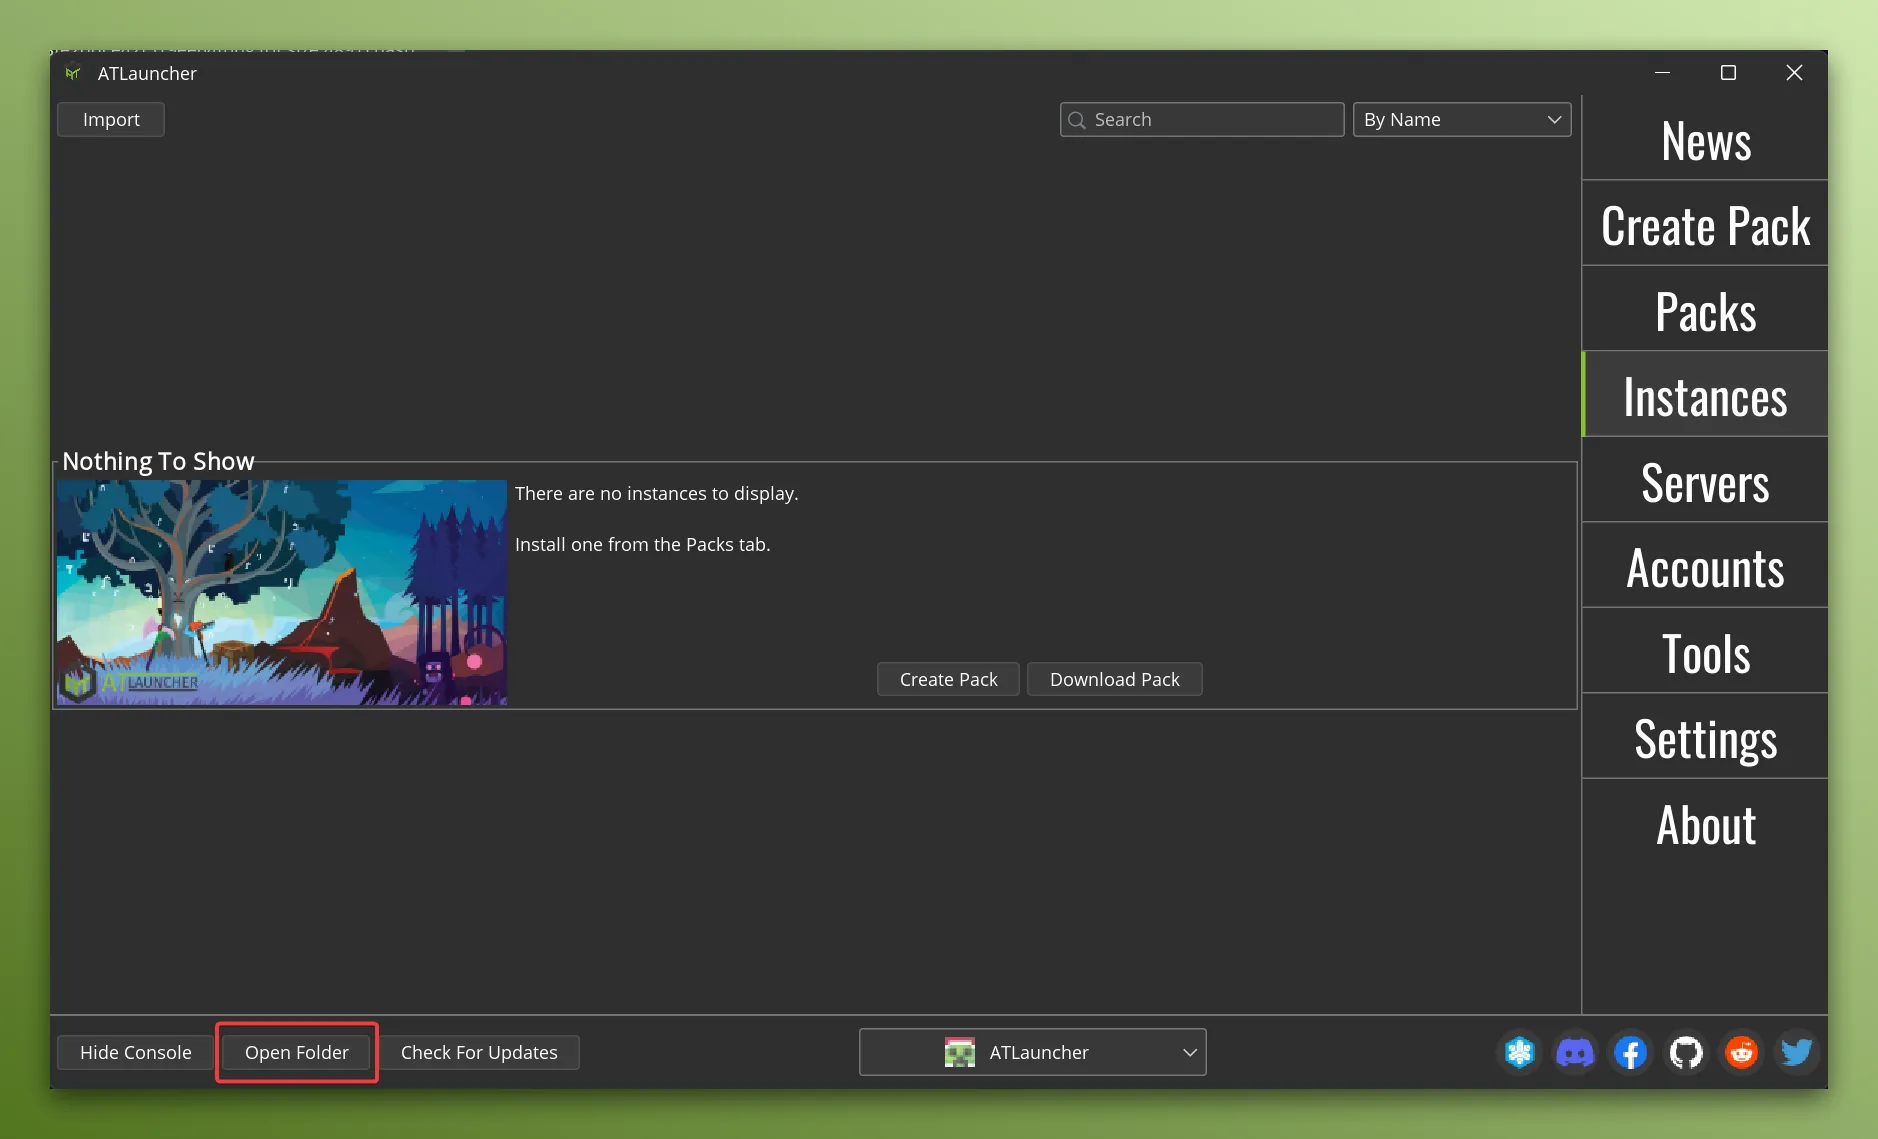
To find the folder that ATLauncher is installed in, you can click “Open Folder” in the launchers bottom left corner:
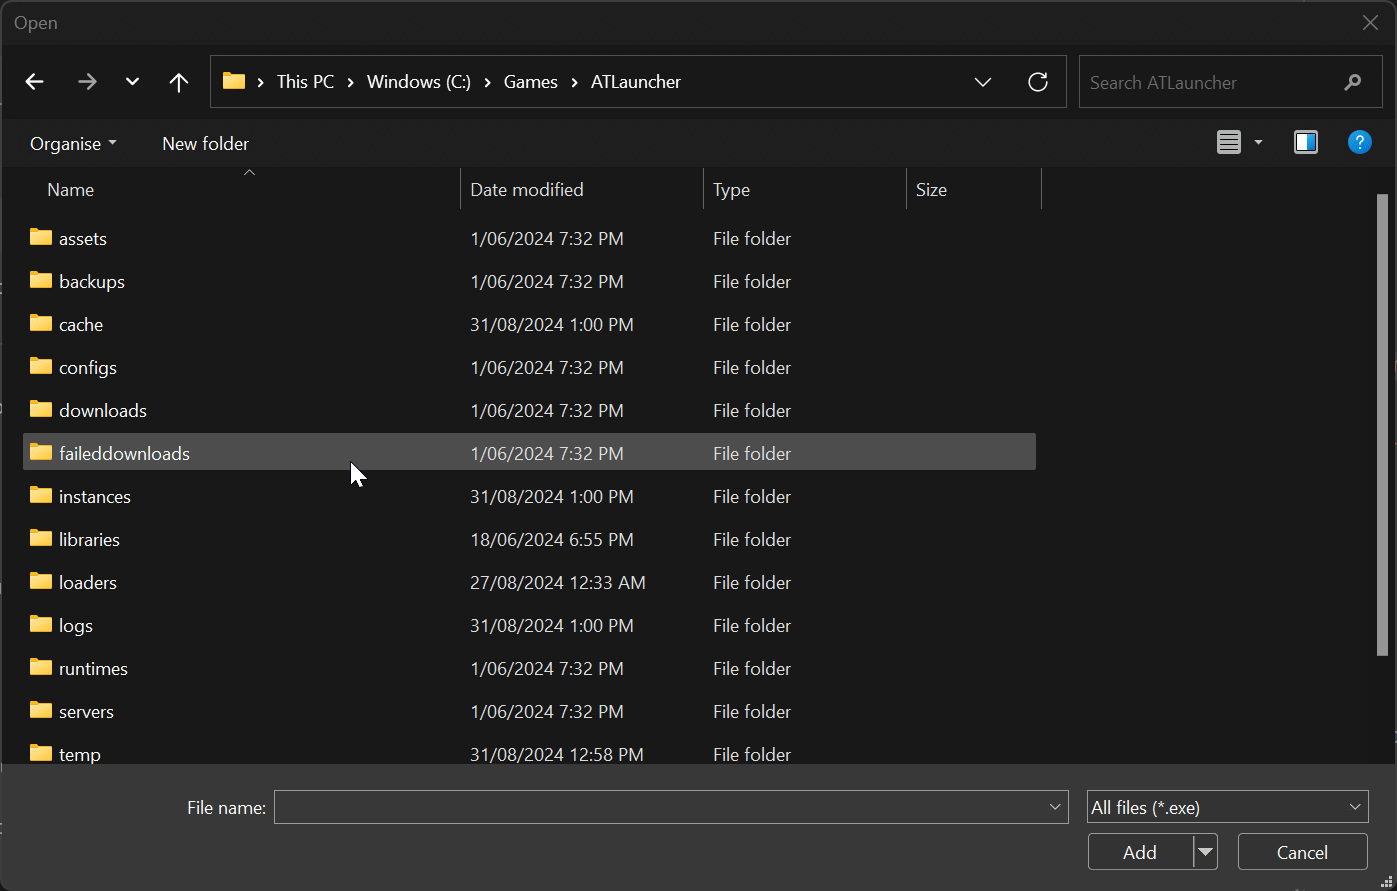
Then you need to go into the runtimes folder and then into the minecraft folder. Within this folder you’ll see one
or more folders for each of the runtimes that Minecraft uses. You must add each of these folders by going into the
folder and finding the bin folder which will have a javaw.exe file in it.
See the below gif for an example of finding one of these runtimes:
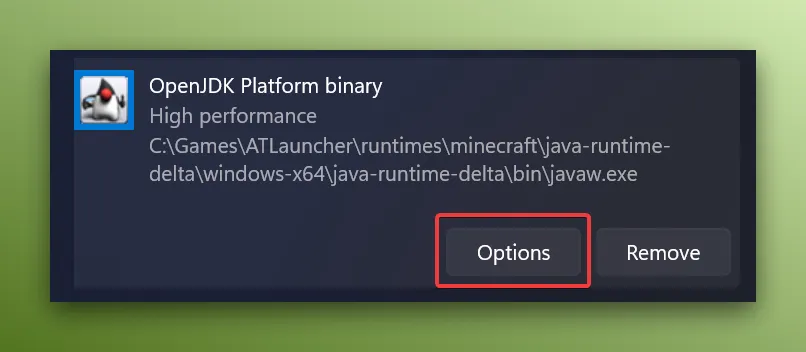
Then you can click Options button on the item that was just added and then choose High performance and then click
‘Save’:

You’ll need to do this for all the runtimes that are in the launchers folder, also keeping in mind that newer Minecraft versions may use new runtimes which will also need to be added.
Changing In NVIDIA Control Panel
Section titled “Changing In NVIDIA Control Panel”If you use a NVIDIA GPU, you can change the GPU that’s used by going to the NVIDIA Control Panel and then going to
Manage 3D Settings and then you can choose to change the preferred graphics processor at a global level or by going to
the Program Settings tab and clicking Add.
You then need to browse to the folder that you installed ATLauncher.
Click here if you don’t know where ATLauncher is installed.
To find the folder that ATLauncher is installed in, you can click “Open Folder” in the launchers bottom left corner:
Then you need to go into the runtimes folder and then into the minecraft folder. Within this folder you’ll see one
or more folders for each of the runtimes that Minecraft uses. You must add each of these folders by going into the
folder and finding the bin folder which will have a javaw.exe file in it.
See the below gif for an example of finding one of these runtimes:
Once added you can then select the preferred graphics processor.
You’ll need to do this for all the runtimes that are in the launchers folder, also keeping in mind that newer Minecraft versions may use new runtimes which will also need to be added.